The new semester started 3 weeks ago, and I realise that I'm gonna get busier by the week.
So here's a little entertainment.
How many of you have actually watched Journey To The Center Of The Earth 3D??
Yes, the 3D version...
Ever wonder how it works?
You can read the full article at HowStuffWorks, but to cut things short, they basically make use of a human's binocular vision to create a 3D effect, such as things flying out from the screen.
But that usually requires a special camera to make the film and special 3D glasses to watch it.
However, with a little effort, everyone can see 3D without all those thing-a-ma-gigs.
Ever heard of cross-viewing and parallel viewing?
Here's a rough idea:
Normal viewing :
This is naturally how humans look at things
Parallel-viewing :
Basically, you have to look "through" the image.
Cross-viewing :
IMO, the simpler method for 3D viewing.
Here's the catch :
NOT ALL images can be cross-viewed,
but ALL images can be parallel-viewed.
Method 1 for cross-viewing :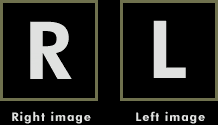
To view a Cross-eye stereoscopic image pair, you must cross your eyes so that your right eye sees the right image at the same time your left eye sees the left image.
This may take some practice. Stare at the point between the two images and slowly cross your eyes until the two images merge into a center image (with an extra image on either side).
You should see something like this when your eyes are crossed:
Quoted from 3Dexpo.
Method 2 for cross-viewing :
The single finger method
You'll need to aim your eyes in front of the 3D image. You'll use your finger to help you figure out where to aim your eyes.
Bring your forefinger up about six inches in front of your nose. Focus both your eyes on it.
Just to prove to Miss Chew Yuhhui that I do indeed have a camera... Nah!! xD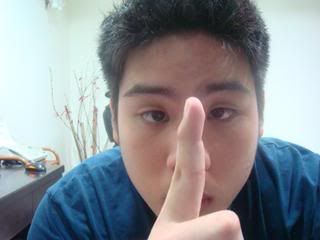
While focusing on your finger, notice what has happened to the circles on the screen. You should see four circles. Keep focusing on your finger, but at the same time observe the four circles on the screen.
Move your finger slowly toward the screen (still focusing on it!) until you see the two middle circles slide together and merge into one figure. The combined figure is composed of two concentric circle. The inside circle pops toward you in 3D.
You are using your finger to help you. Make a subtle shift of your attention from your finger to the figures when you find the right focal point. Get your finger down and out of the way once you get the combined 3D figure.
This takes most people several tries, especially the first time. If you have problems, play with the positioning of your finger and the shift of attention from your finger to the 3D figure. Slowly move your finger back and forth until you find the position that gives you the 3D image.
At first, the 3D image might come in blurry. Relax a little, give your mind a chance to organize itself and the 3D image should come in sharp and clear.
Quoted from Magic Eye 3D Viewing.
If you've mastered the art of cross-viewing, here's something cool to look at!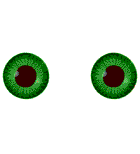
Do you see an eyeball floating in mid-air?
If you do, then congratz!!
You must be wondering why I have not touched the parallel viewing method yet.
Well, coz it's not as simple as it looks!! At least that was how it was to me...
OK here goes:
Method 1 for parallel-viewing :
1. Get up out of the chair and onto your feet. Prepare to assume a slightly contorted position.
2. Put your nose right up against the computer screen. The image will become very blurry. Admire those glowing blotches of color. The point is you have just easily defeated your tendency to focus right at the surface of the computer screen. In order to see the 3D image you must look through the computer screen, not at the computer screen.
3. Ask yourself what your eyes feel like because you need to maintain the same feeling and the same posture of your eyes as you move away from the image. Check yourself again. Completely relax your eyes. The image is blurry. You are staring through the monitor, off into space.
4. Now slowly take a step back from the computer screen while maintaining the same position of your eyes. Allow the image to remain blurry. Relax, breathe, blink.
5. Continue to walk very slowly backwards, away from the computer screen. The hidden 3D image will gradually come into view.
6. Continue aiming your eyes behind the computer screen. Do not look directly at the image or the computer. If you suddenly shift your focus and look right at the screen, you will lose the 3D effect. Try again.
7. Once you recognize the 3D shape, if you continue to look into the background rather than directly at the shape, the 3D effect will increase.
Stereoscopic perception seems to have a saturation effect in the brain, so if you keep looking at the image for a while you will notice that your perception of the depth increases. Cool.
Quoted from Magic Eye 3D.
Method 2 for parallel-viewing :
The Famous Frankfurter Experiment
1. You need to look into the distance for this, so turn away from the computer monitor.
2. Pick a specific object in the distance. Aim your eyes at that target.
3. While looking at that distant target, bring your index fingers, tips touching, up in front of your eyes and into your line of sight.
ATTENTION: Miss Chew Yuhhui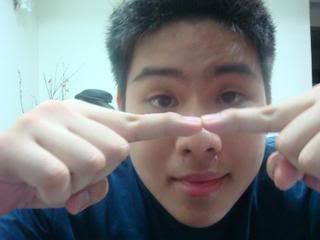
4. While still aiming your eyes at the distant target, calmly notice that a mini-frank has appeared between the tips of your fingers. Do not allow the awesome beauty of the mini-frank to distract you and cause you to aim your eyes directly at it. Continue to aim your eyes into the distance at your target.
5. Pull the tips of your fingers apart slightly and observe the frankfurter floating in the air.
If this experiment is successful, you'll see a miniature frankfurter floating in the air as pictured below. Wow! =D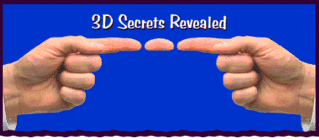
***You can also practice parallel-viewing using the images from cross-viewing.***
EXTRAS: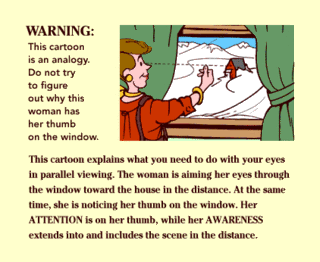
Practice:
A simple image that you can pratice both cross-viewing and parallel-viewing.
Want more?
Click here for more stereo photographs
FOR PARALLEL-VIEWING ONLY:
Click here for starters
Click here for pros =D
Hope you've learnt something new today =D
Enjoy!! =)
Sunday, August 3, 2008
A whole new dimension, 3D
Time was stopped by
the Chronosapien
at11:32 PM
![]()


